|
|
|

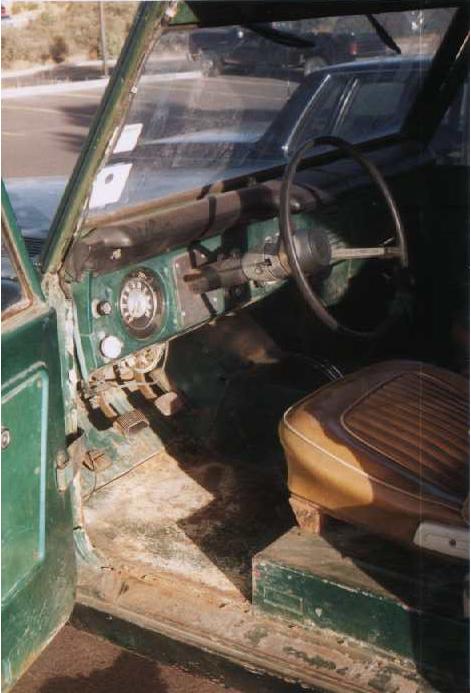
SO, YOU'VE GOT A RUSTY TRUCK.
"What can I do to fix all that terrible cancer?" you ask. Well you've come to the right place. A native of Maine, I've seen my share of body rot, and have had a lot of experience doing it. To be honest, best way to take care of rust is to get a replacement fender, hood, or body, but this page is assuming that that type of repair is either too costly or impractical for your purposes. In that case, you have a couple of different options: pre-manufactured patch panels, custom-made (i.e. half-assed) patch panels, home-brew fiberglass kits, or (in non-structural areas) aluminum window screen and JB Weld. (Of course this is also assuming that you have an actual hole through the metal, not just surface rust) The technique I'm going to cover here is the half-assed patch panel. It's cost effective, and the idea can be applied to the other methods. Best of all, it's not too hard. Heck, I did this in the parking lot of my college in the middle of January! (Of course, my school IS in Arizona, but hey, the nice weather is just one of the perks!)
[As a side note, to fix surface rust, just get the rust off (sandblaster, wire brush, naval jelly, etc.), cover the rusty area with bondo and sand it until the pits are hidden, then prime and paint. Also, for the window-screen and JB weld method, use the techniques below, but instead of a patch panel, bend aluminum window screen to shape as a form, then spread the JB weld over it, much like you would with plaster on chicken wire. This is one of the only home-brew techniques, besides fiberglass, for patching compound curves like might be found on vehicle fenders, or other such ares. While not as strong as steel, this method is much stronger than bondo alone, and is almost as strong as fiberglass. Another alternative, if you have some sheet metal kicking around, is to make your own patch panel. This technique, used by my family and friends who are major cheap asses, usually ends up with a piece of stovepipe or stop sign cut and bent into a rough shape, then stapled or duct-taped into place. While stovepipe is easy to fasion, and stop signs are sturdy as hell, these techniques are not reccomended if you want to do the job right. All those who have done the stovepipe/stopsign fix, give yourself 10 lashes with a piece of rubber fuel line. You know who you are. ]
Ok, step 1 is to take a look at your rusted area and determine exactly the extent of the damage and also how difficult the patch job will be. Also be sure to check and see if any underlying structural parts were damaged. For example, is the hole on a flat or a curved section of metal? Is the hole in an important place, like a body mount, or a seat mount? How strong will the repair have to be? (Will it be supporting the weight of a person? Or the weight of the cab?)
Next, decide how big a patch panel you need. Keep in mind that you may have to remove surrounding metal, making the hole bigger than it appears now. Once you have an idea of what you need, sketch out how it will look, and label it with the necessary dimensions, angles, etc. Basically, make a cheesy blueprint of what you need. Remember, in order to use pop rivets, the old and new metal MUST overlap, usually by at least an inch. Now, head on down to your local sheet metal shop. Tell the nice hick with the tattoo what you need and give him the "blueprint". You'll probably discuss what type and thickness of metal you want. The smaller the number of the gauge of metal, the thicker it is, and the more it's going to cost. So that means, 22 ga is wee, 20 ga is not so wee, and 16 ga is friggin' huge! I had a patch panel for my hardtop made out of 20ga steel, and I think it's thicker than the actual hardtop's steel. 20ga is thick enough that you need pliers or strong hands to bend it. It would be great for floorboards or such. For fenders or body, I'd reccomend about 22ga, because you'll need to bend it to fit, anyway. Now, keep in mind that these sheet metal shops don't usually do super-fancy stuff. Generally, they can't make curves, just angles. Equate it to oragami with metal. Now, for really simple stuff, they can sometimes make curves. For my hardtop, I needed a curve, and the guy said he'd see what he could do. What he ended up doing, was making a whole lot of little angle bends, so that the final effect was that of a curve. Do NOT expect them to be able to make compound bends. The patch panel should be relatively cheap. My patch panel was 57" long, 6" wide, bent with a 90 degree angle along the length of it, with a curve running lengthwise, yielding a 57" long "C" shaped piece of metal. That ran me $15. Not too shabby.
While you wait a couple of days for the patch panel to be made, you can start cleaning up the hole. A sandblaster is the best way, but a wire brush, hacksaw, or dremel tool would also work. Be sure to remove all the rust, and get down to bare metal (make sure to get both sides!). Once the rust is gone, if the metal is too thin to mess with (if you can easily bend it, or it has a ton of pinholes) then get out the hacksaw or dremel tool and cut out that nasty metal. Alternatively, you could drill a bunch of holes to perforate around the thin metal then tear it out like toilet paper. Tin snips might also work. Once you have the hole cleaned up, squirt some primer on it to keep it from rusting. If you work the way I do, by the time you get this done, the patch panel should be ready.
Once you get the patch panel, prime it also to keep the rust at bay. Now, get out your welder or pop-rivet gun. (You DO have a pop-rivet gun, right? They're only about $10 at WalMart, and they usually come with rivets, so go get one!) If you're welding, I assume that you're a big kid and can figure out how to weld it in. If you can't, then why in hell do you have a welder? OK, now you need to test fit the piece and make little adjustments with your hands, and/or pliers (Be careful, the metal is sharp! It gives "paper-cuts from hell!). If you're patching a fender, you probably want to put the patch behind the existing panel to make it easier to bondo over. Otherwise, if it's something that won't show, or won't matter, put the patch on top to make it easier to see what you're doing. Once it's fitted to your liking, check to see if there's any holes that need to be drilled BEFORE it's bolted together. It sucks having to take out all those pop-rivets just because you forgot you had one more hole to drill. Now, the panel should be ready to be permanantly attached to your truck. Starting from one corner and working around (or from the middle, and working out; your preference) one at a time drill a hole the same size as the pop-rivet, insert the pop-rivet, and use the rivet tool to set the rivet in place. You will notice that one side of the rivet sits semi-flush, like a panhead screw. The other side has an ugly tit sticking out. You may or may not want one side facing a particular direction, it's your call. If you messed up and now want to put the rivet in the other way, no worries. Just drill the center of the rivet out and replace it with a new one. Now, just continue along drilling, then riveting until you've gone all the way around the patch panel. The rivets should be spaced according to how strong the attachment has to be. For something like a floorboard that needs to be strong, every 1.5" would be pretty good, less would be necessary for less important areas.
OK, you're almost done. Now you just have to seal it up. For stuff like floorboards, or underbody stuff, get some silicone caulk and spread a bead along the seam where the patch meets the body, both above and below the truck. This will keep water out, and prevent rust where the patch and body overlap. For stuff that's going to show, you may want to countersink the edges of the patch with a body hammer so you can bondo over it. Also, Bondo makes a fiberglass kit for about $8 that includes everything you need to make a great fix, even 3sq ft of fiberglass cloth. Use the fiberglass as per directions to seal the patch around the edges, and to smooth the transition from patch to surrounding metal. Once the fiberglass cures, the patch panel is even more firmly adhered to the surrounding metal, as well as being water and rust-proof. Now, all you need to do is get out the bondo, primer, and paint, and your truck is almost as good as new!
For bondo and painting tips, see the painting section, soon to come!
